Hope you’re all doing well! I’m pretty smashed up from a big crash a couple weeks ago. BUT DON’T WORRY- this month’s tutorial is going to be really good! Big thanks to this guy: LOGAN!
Ya’ll ask so many great, specific riding questions, which is awesome! But I do get these “how do I ride like you?” questions that are so general I’ve never known how to answer. But the real answer isn’t how to “ride like me”, it’s how to ride like you, at the best of your abilities.
It’s no secret that practice gets anyone better. But exactly how to practice can often be the “secret” that we all need to find. I’m not going to say that these drills are the only drills worth doing, or that they are even the best drills, but I will say it’s what I’ve done and what has helped me.

That’s right, every month I post a full riding tutorial to my Patreon page. Patreon is a subscription service and supports me MUCH better than does YouTube.
First off, just like with yoga, before you get started with these drills, set your intention. This is like a goal, but less specific. Is your intention to become faster? More consistent? Safer? More aggressive? More confident? If you can pick one specific thing to keep in mind as you practice, it makes it a lot easier to improve and will keep you motivated. Then as you get better with the drills, you can then find some specific goals. An example of a goal would be “I want to be able to stop from 4 pedal strokes within only a 6′ space.”
And finally, use flat pedals for these. While you might prefer clipless pedals for offroad riding, learning these on flats is safer and teaches more overall skills.
Drill 1: aggressive braking

STOP! Sprinting into a braking drill might seem like a waste of energy, but the mental practice of increasing speed before you need to stop helps us internalize that we can accelerate and decelerate WAY fast on a good bicycle. You have to go slow in order to go fast! Check out how much compression that front tire has. That sucker is at a full 22 psi, too- and Logan is a lightweight!
Often overlooked, being good at high performance braking is a HUGE skill. This means being able to brake hard, in the least amount of distance possible, and with as much control as possible. This means no skidding, but lots of stopping. The intention I set when I practice this is to be as aggressive on the brakes as possible. Set up start and finish lines, with another marker to help you find your ideal brake point.
- Sprint towards an obstacle (3-5 hard pedal strokes) and brake before you hit it.
- Goal is to not skid, but get as much performance out of your brake as possible
- ALSO- sprinting into this will improve your pedaling efficiency and clarity of how much is possible with just a few pedal strokes. When I do these, I DO NOT think about how I almost ended myself two weeks ago after only four pedal strokes.

On steeper descents, or in situations with more traction, you can get further back on your bike. At least, I do. Modern bikes mean you can be pretty centered. Unfortunately, when folks hear “get back”, I guess they think it means belly against rear tire. When I think “get back”, it’s basically this- butt just above the rear axle. Again, see how low Logan is on the bike? That’s critical, and if you can only learn one thing from me, it’d be to get low on the bike!
Some folks instruct to stay centered on the bike, while others say to get back. One thing is certain- get low on your bike. I get very rearwards on my bike, as that’s my personal attack position. I get even more rearwards when I’m on a steeper section of trail. For a more in depth tutorial on this drill, check out this previous vid. I also have a lifetime of practice riding like this, and have spent years in the gym to support this posture of mine.

Logan’s body position is pretty good here. Notice how low he is on the bike? This allows for maximum braking power. You can also push down hard with your legs to generate more downforce on the rear tire. O face for bonus points.
Drill 2: basic trials circuit
We’ve all gotten to that tricky section of trail that we can’t quite ride easily. While a challenge is awesome, having to stop and walk really interrupts a trail’s flow, and it also doesn’t help your confidence. These general bike skills will make you one with your bike when the going gets tough. A good intention (or goal) to set for this is low-effort consistency. If you can do these smoothly, with a goal of getting through the section smoothly, it’ll build those slow speed control skills that end up separating the discerning riders from the newbies.
- Goal is to not put your foot down
- Find something that’s repeatable, yet slightly challenging
- Repeat- and when you can do it no problem every time, find a way to make it harder
This is a classic moment for the clipless folks to say that they can’t do this on flats. Well, that means you need to learn! There will be a moment when you need to do this on a trail but somehow came unclipped before hand. Learn how to do this on flats and you’ll be that much more well rounded, and confident, of a rider. For more info on the specifics of the best trials drills, check this video.

This first trials course I picked was too challenging. My bad! As you set up a course, go for something that’s only going to slightly challenge your skills. The goal is consistency and fluidity. When you want to start improving just one skill, then you’ll isolate that skill. But the point of this goal is more general, and more realistic. If you can find a friend to do this sort of thing with, it’ll be a lot more fun, too.

This looks pretty gnarly. Nice line Logan!

In your trials circuit, incorporate some variations in obstacles. A skinny on its own might not be a big deal. But after you’ve done a few other moves before it, and you’re trying to be consistent, everything is suddenly going to feel harder than normal. Sort of like when your wife asks you to show off for her and she has her camera phone recording- suddenly you’re realizing that America’s Funniest Home Videos is more likely than success. Or at least all your inlaws will surely see your impending failure. Either way, start small, and work up.

Stair hops are a little tricky, but once you can do 1, you can do 20! They take a lot of energy and are ugly as all heck, but they build a ton of skill! Getting forwards over the bars like this makes it easier with flat pedals.
Drill 3: cornering
The old saying goes jump for show, corner for dough. Cornering is often what separates the fast from the sketchy. This drill is my favorite of all that we’re doing here, but it’s also the hardest to find a good location for.
- Set up a cone course slalom. Try to incorporate 4-6 corners. The wider the cones are, the more you’ll need to turn. Now, the increased frequency will also make for a tighter turn. I recommend moving the cones a few times to change this all up. It’s just as important to practice the slow, tight turns as it is the faster ones that incorporate a bit of a drift. You’ll find all of these on the trail.
- Goal is keep feet on the bike and to not skid the rear wheel through the turns
- Practice that pumping motion to work the bike through the turn
Lean the bike down and into the turn while keeping your body centered over the cornering knobs. You can get started by dropping the outside pedal, and as the corners get wider or faster you’ll find that this is less important. I did a full cornering tutorial here.

I got these traffic cones at the dollar store, they were $0.50 each. I guess that means they are a 2 for $1 deal? The Amazon cones I use for my clinics are much higher quality. Beer cans work fine too. Oh, and this choke point to begin (or exit) a drill can be really helpful! It makes each run much more consistent.

Back in California, baseball diamonds were never really prepped very well. At least, public ones weren’t. Here in Washington we had to be very careful not to hit those nice white lines. The slippery sand is great for sliding around! I am just about to pull back hard on my handlebars here, this shot is halfway through my pump from the front of the bike to the rear.

The cutties drill had us practicing with a straight line slalom. That’s a lot of fun, but by tightening up the turns the “pump and pull” technique makes more sense. I don’t know about your locale, but here in our town, we have trees all over, meaning we rarely get such small turns. And the trees aren’t as soft as the traffic cones!


These drills are actually pretty fun. Fun?! Yes, I promise. Well, maybe not fun at the time- but once you notice that you’re cornering on the trail is that much more reliable, and you see your times start dropping, you’ll see that there’s some pay off. Or maybe Logan is laughing at me for spending so much time in empty gravel fields over the years. But look where it’s got me! Oh wait, I’m quasi-employed, would probably qualify for disability based on my shoulder, and all my bikes are thrashed within weeks of arriving at my doorstep. Hmmm. Maybe I should get a hair cut and a real job? Nah, I think I’ll spend more time in gravel fields!

My “pump and pull” cornering in action. I haven’t even finished my pump yet and I’m already further back than Logan was getting. Everyone is built differently and will end up riding slightly differently as well. I’m all about getting BACK on the bike, but most folks simply need to get down.

Who doesn’t love drifting? And you won’t earn a Reckless Driving ticket for drifting a bicycle in a dusty parking lot!

As you start pedaling, and accelerating out of the turn, your control of the bicycle increases substantially. It also looks like Logan is pulling back on the bars- this is natural when you’re in a sprint, and when exiting a turn, it also helps that front wheel avoid slipping out.

Looking ahead to the next turn is paramount if you plan on successfully completing the course. And if you won’t be completing the course, you’ll earn an Incomplete. While D’s earn degrees, Incompletes only earn debt and wasted time.

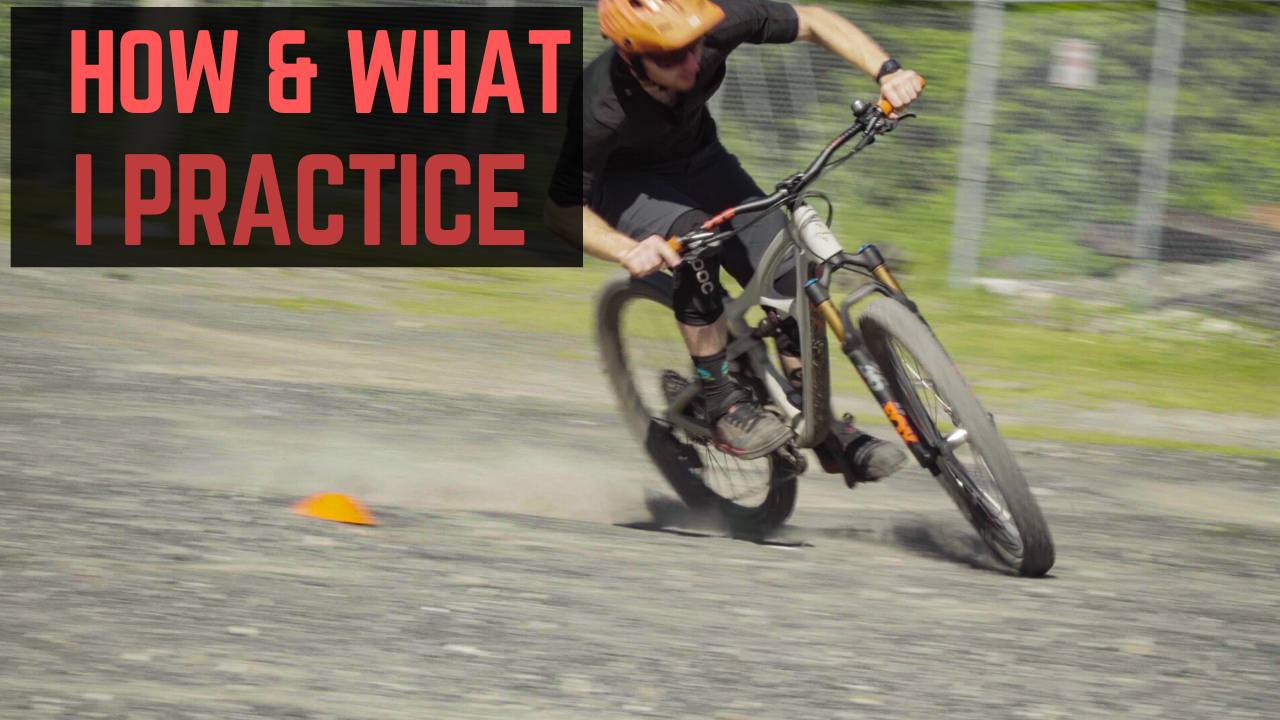
I think Logan is right on the very edge of traction here. Without any gloves, he’s a trusting soul. Me, I’d be nervous here.

Logan is initiating the turn by leaning forwards. This gravel is so sketchy that the back wheel has already decided that it’s going to take some time off and drift a bit. That’s fine, but hopefully that tire decides to get back in line before the next turn.

See how Logan’s right arm is flexed? He’s pulling back on the bars there. You can also see his body position, butt slightly behind the saddle, and head low. This is a solid attack position.

Notice that the outside pedal is down, heel slightly dropped. This is because it’s supporting the majority of Logan’s weight. Which isn’t much, I think I’m 20% heavier despite being only 2% taller. Numbers are fun, but pedal position through turns is more fun.
The most important aspect of all this is repetition. These drills are neat, but it’s a good idea to change them up consistently so that they don’t get boring! You can totally integrate the braking drill into the cornering drill, and you could even have a mini trials course to get back to the top of the slalom. But then it also gets a lot more complicated, meaning the effectiveness of each specific drill will go down. Regardless, find something that’s fun and beneficial for you, and stick with it.
Let me know if you have any questions, and happy practicing!
General Affiliate Links:
Jenson USA: https://bit.ly/JensonUSA2022JKW
Industry Nine: https://bit.ly/IndustryNine2022JKW
PNW Components: https://bit.ly/PNWComponents2022JKW
Shimano: https://bit.ly/Shimano2022JKW